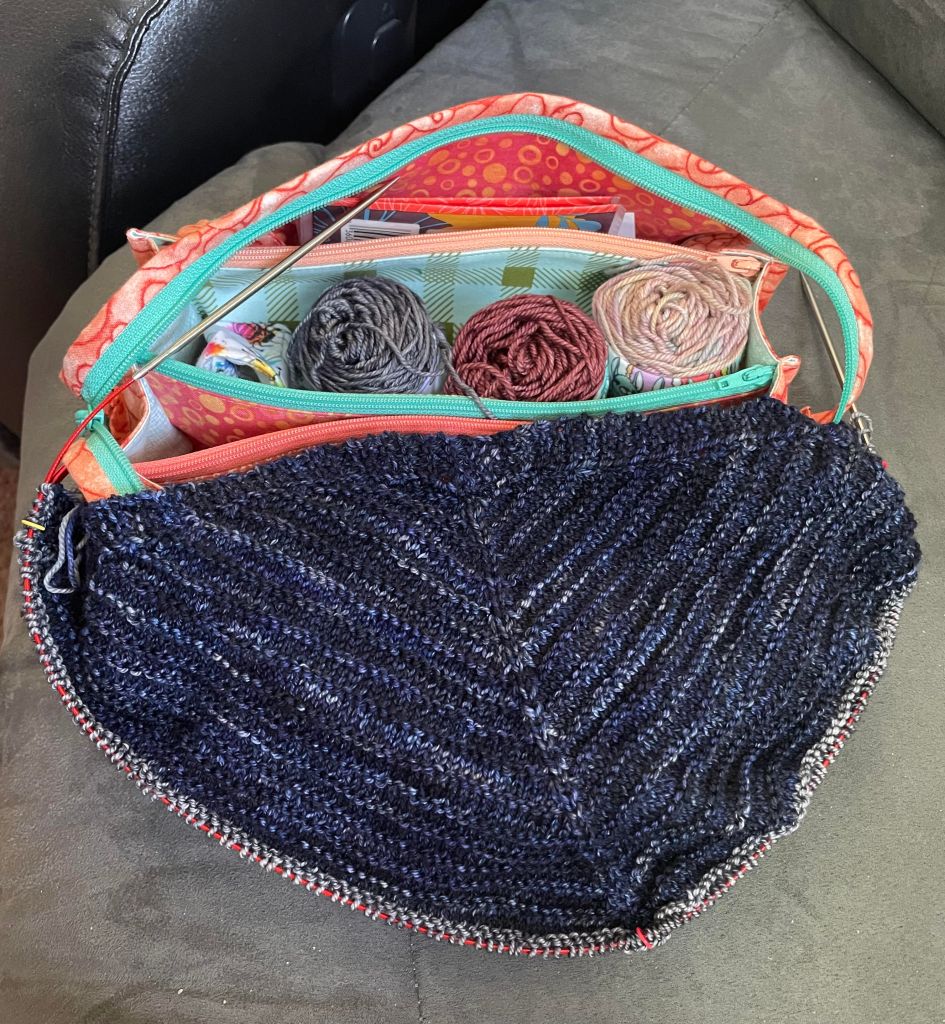
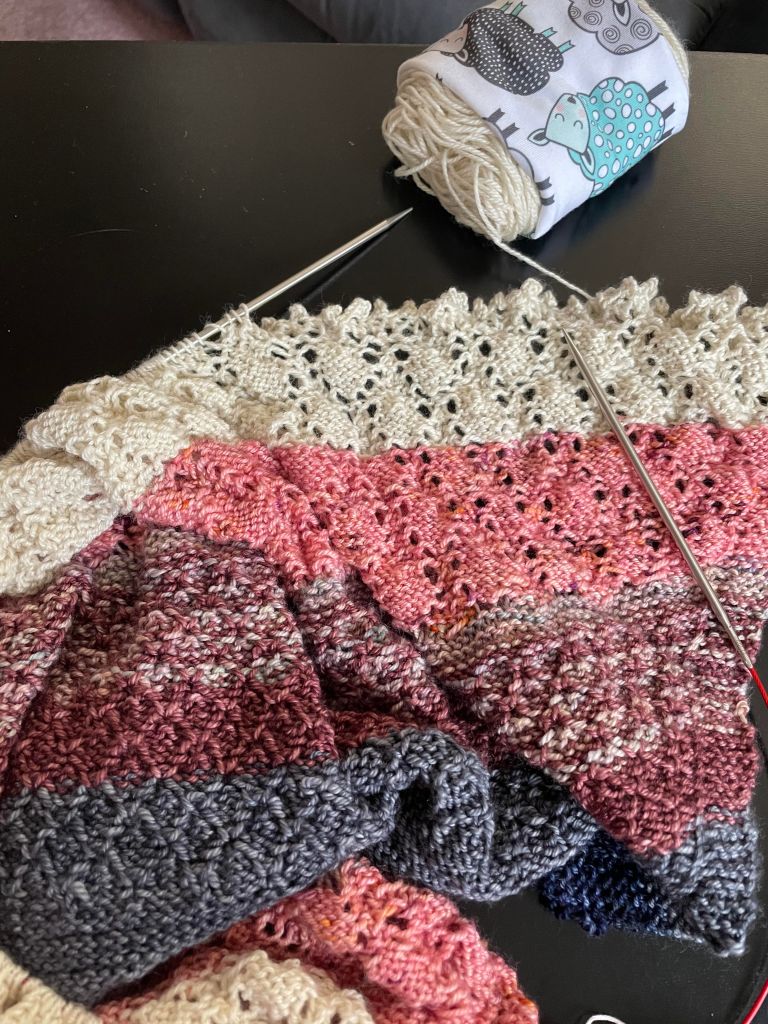
I usually spend some time in the morning knitting on whatever project I have going. It is my new normal during Covid this last year. I am really loving stitching on the Merfolk Fade shawl. The pattern has been easy to follow and the patterns are pretty easy to pick up and remember without too much looking at the pattern. I did run into a minor snag the other morning and I couldn’t get the correct number of stitches on one side of the stitch marker. So I messaged the designer and she was quick to respond and corrected the pattern and messaged me back. She was grateful that I brought it to her attention and even gifted me the pattern in my Ravelry. The pattern that I have was included in the Merfolk Fade kit that I purchased from Cape May Fiber Co. So I am really happy to have it in my Ravelry forever. So here is where I am with the pattern so far.
Merfold progress
These yarns are really out of my comfort zone, but when I saw them as a kit, I instantly fell in love with them. And I am loving how they are knitting up together. I could have never put these colors together myself. Soon I will be adding the third color, which is my favorite. It has a lot of pink in it and I can’t wait to see how it knits up. Here is a close up of the patterns in the shawl.
Close up of Merfolk
Even with all of the colors in the yarn, the patterns are easy to see. I love everything about this shawl; the pattern, the soft, squishy yarn and the colors.
So what is on your needles, knitting, cross stitch or even crochet?
A couple of months ago I saw a post in a Facebook group about Acrylic Bobbins. Wow! I loved how sleek and smooth they looked. Someone was making them and selling them on Etsy. This same seller was selling a complete set of vinyl labels with all the DMC #’s. I am a sucker for reorganizing and storage. So I had to go check it out. After chatting with the Seller, I had to order! I couldn’t wait for them to arrive. And when they did, I went right to work. I added the labels to the new acrylic bobbins and spent 2 days unwinding my flosses from the paper and cardboard bobbins and winding them onto the new bobbins.
New Acrylic Bobbins
Just at look at how awesome those bobbins are looking! It was so fun and relaxing winding a skein of each of the colors that are not being used and putting them in the perfect box. When I received my set of bobbins, they arrived in this case:
Full set of Acrylic Bobbins
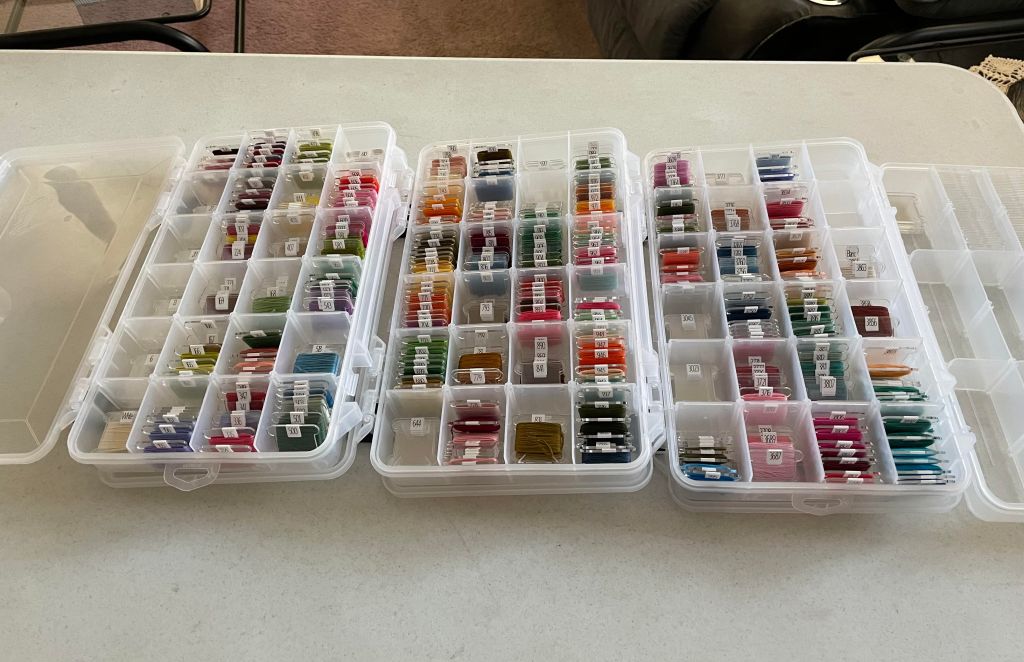
I was able to find more of these boxes at a local Menards store. I believe that they are available on Amazon. But isn’t everything? LOL. I think that my entire set will fill 3 of these boxes. I tried to leave adequate room for the empty bobbins, but I could end up using a 4th box.
My New Bobbin Storage
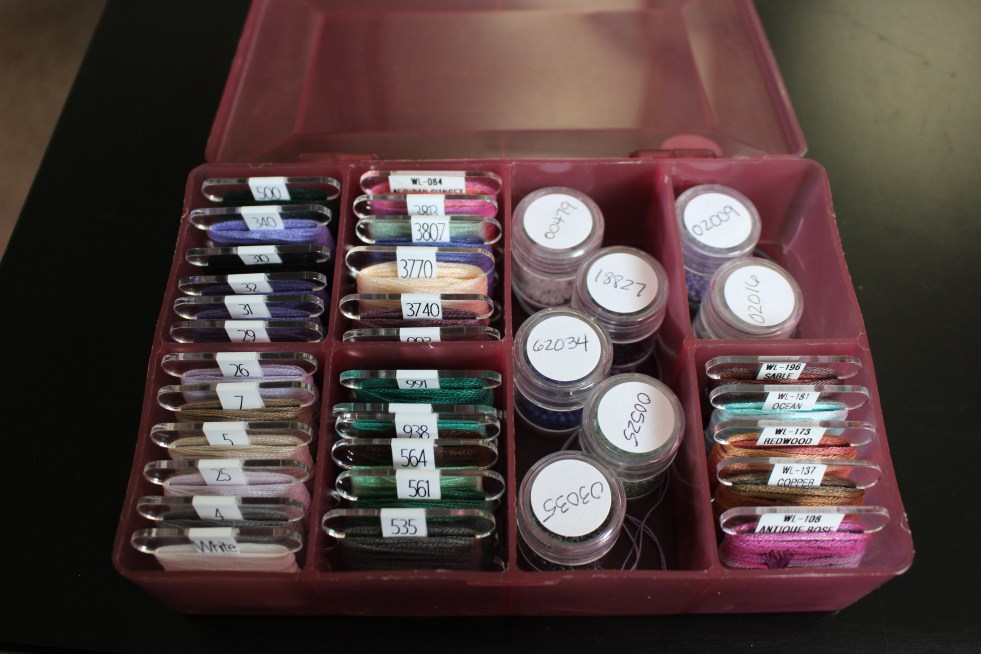
I love how these bobbins look in their boxes and they will look even better some day when I can get the empty bobbins filled. I have 11 or 12 projects in the works with floss in each of them that will eventually make their way onto the empty bobbins. I went back and forth trying to decide if I wanted to wind new flosses onto the empty bobbins, or try to use the 150 floss that are already in projects. I decided to eventually move the existing flosses over to the new bobbins. That means I have to get working on those WIP’s and get them done! Here is my small box of flosses I used for Mermaid Perfume.
Perfect Bobbins
I love that the numbers on the bobbins are at top of the bobbin rather than on the side as they were on my paper bobbins. The bobbins on the right have Caron Waterlilies on them. I even tried making my own labels with my brother printer. They will work for now, but the ink is not as crisp as with my purchased labels. If you are interested in these bobbins, the seller is GWStitchinDepot on Etsy. These bobbins are well made and look awesome! She has different quantities available and you can get the bobbins with the hole in the top or without. She also has the labels. If you purchase the labels, I do recommend the dental tool she sells for picking the labels off of the label sheet. I am so happy to know that I won’t need to purchase paper bobbins ever again.
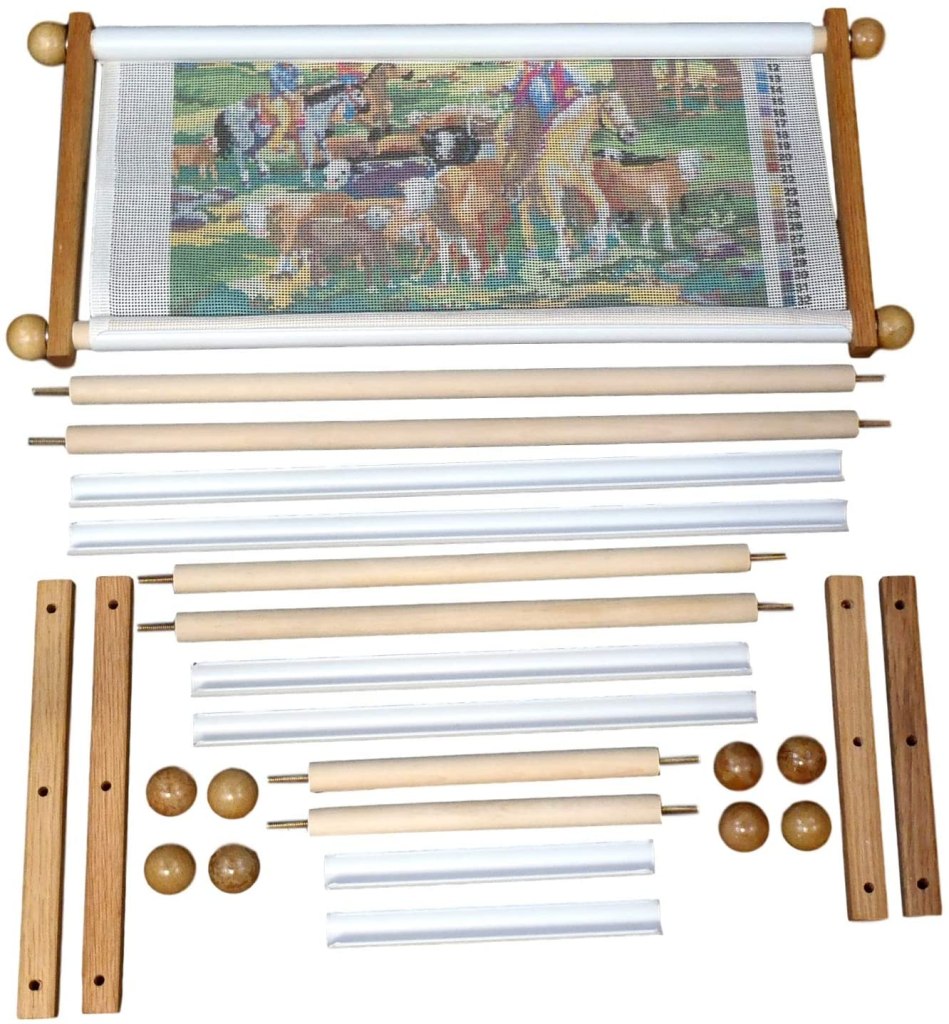
A few months ago, I decided I was at the end of my rope with scroll frames. They don’t keep my fabric tight, the screws get stripped and it is just frustrating. I am not a fan of Qsnaps, as they are awkward to hold. So I didn’t know what I was going to do. Then a friend told me about Edmunds Handi Clamps. So I found a set on Amazon and ordered away. When they arrived, I couldn’t wait to put my fabric for Mermaid Perfume on them and get started stitching.
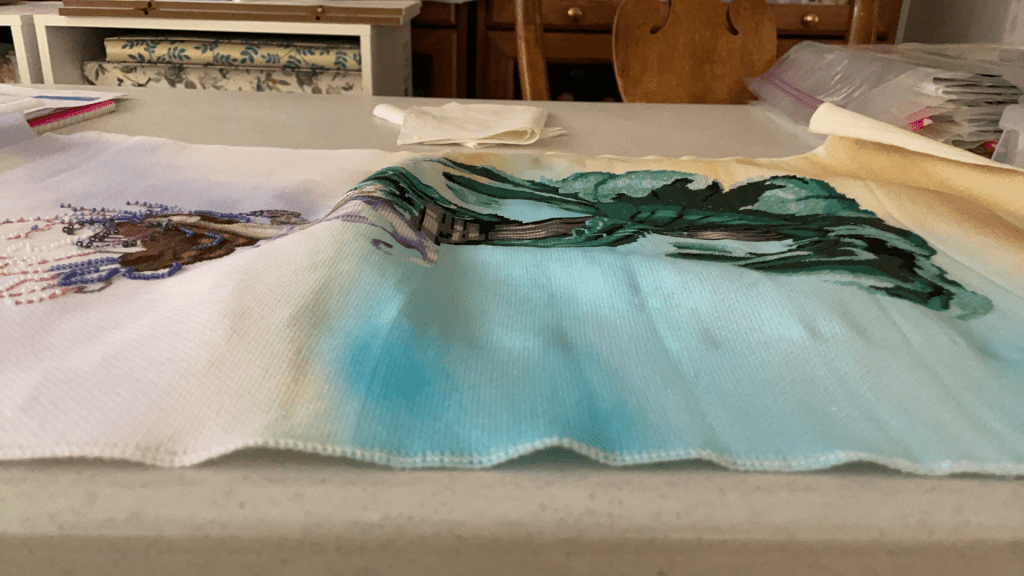
Basically it has rods like scroll rods, but there is no slit in the rods. Instead, a clamp is used to secure the fabric like Qsnaps. I have always read about using felt under the clamp so that the fabric doesn’t get ruined. So, I laid the fabric on the rod, placed a length of felt on top and then added the clamp. I did the same for the other side. Wow! My fabric is taut! And they were easy to unroll and re-tighten. I am in heaven again! Then yesterday I beaded as much as I could in the open area, so it was time to remove the fabric from the scroll frame. And this is what my fabric looked like.
Puckered fabric
Oh no! The fabric is puckered where the stitched area is. I tried laying it out and pulling the ends, but it will not lay flat. What did I do wrong? Do I even want to bead it now? Has anyone else had this happen? I couldn’t find anything in the Facebook groups. So I went back to the package that the scroll rods came in and reread the directions. It does not say to use a piece of felt under the clamp. Ok, I did that on my own. I didn’t want the clamp to ruin the fabric. It does say to clamp the fabric and then to place a piece of batting, 4″ wide and the length of the rod, before rolling the scroll to reduce getting creases in the fabric. I did have a few creases in the ends, but the puckering is what I am worried about. So after some stressing and freaking out, I began to think about what I did wrong. The only thing I can come up with is that my piece of felt was shorter than the length of the rod. Basically it covered the middle, the design area. And since I worked on the project exclusively, I never loosened the scrolls when I was not working on it. So, I put the fabric onto my large Qsnap so I can continue beading.
Beading has begun
I was able to get her tight and flat on the Qsnap. I do hope that when I take her off, she will no longer be puckered. She is so beautiful and I LOVE her on the fabric I chose. I waited so long to see all of her on the fabric. So fingers crossed I have not ruined it. The next project that I put onto these scrolls, will have a piece of batting, the full length of the rod and hopefully that will be perfect. Has anyone had their fabric pucker on their scroll frame? If so, how did you fix the issue?
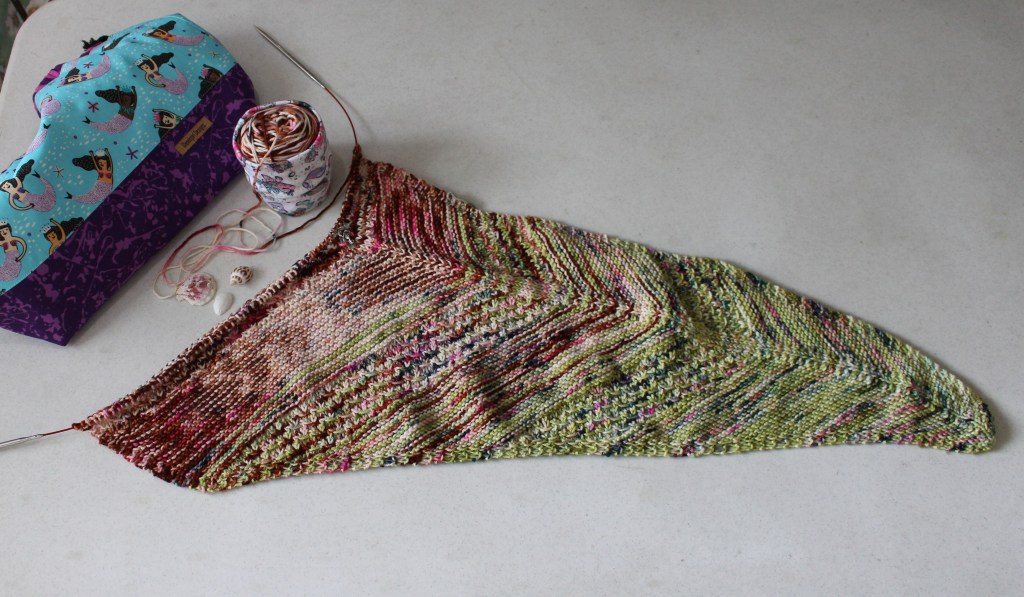
I just have to have something on my needles. So when I finished the You Are Enough Shawl, I immediately started the Merfolk Fade Shawl by Jennifer Owens. The Yarn is DK Merino Superwash from Cape May Fiber Co. and comes as a kit with a few goodies and the pattern. The pattern is also available on Ravelry.
Merfolk Fade Kit from Cape May Fiber Co.
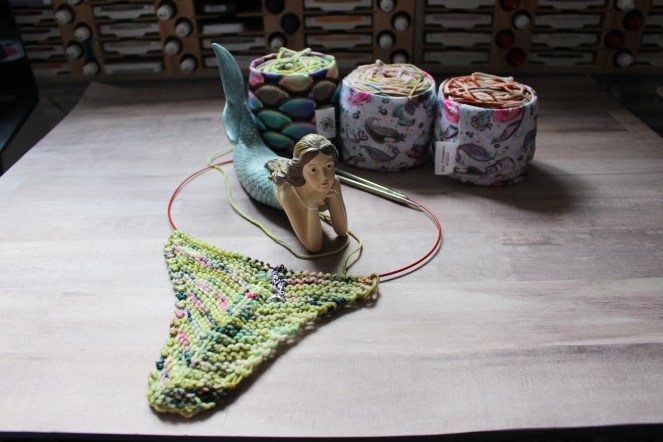
My very small start. And no other stitch marker would do except for a sweet little mermaid! It was included in a bag order I placed with Firerweed Studio. The yarn huggers on my yarn cakes are also from Fireweed Studio. She has cute knitting accessories in her Etsy shop.
Merfolk Fade Shawl start
This is my first shawl using DK weight yarn. The yarn is soft and squishy. It has a bouncy feel and I like the way it glides through my fingers and over my needles.
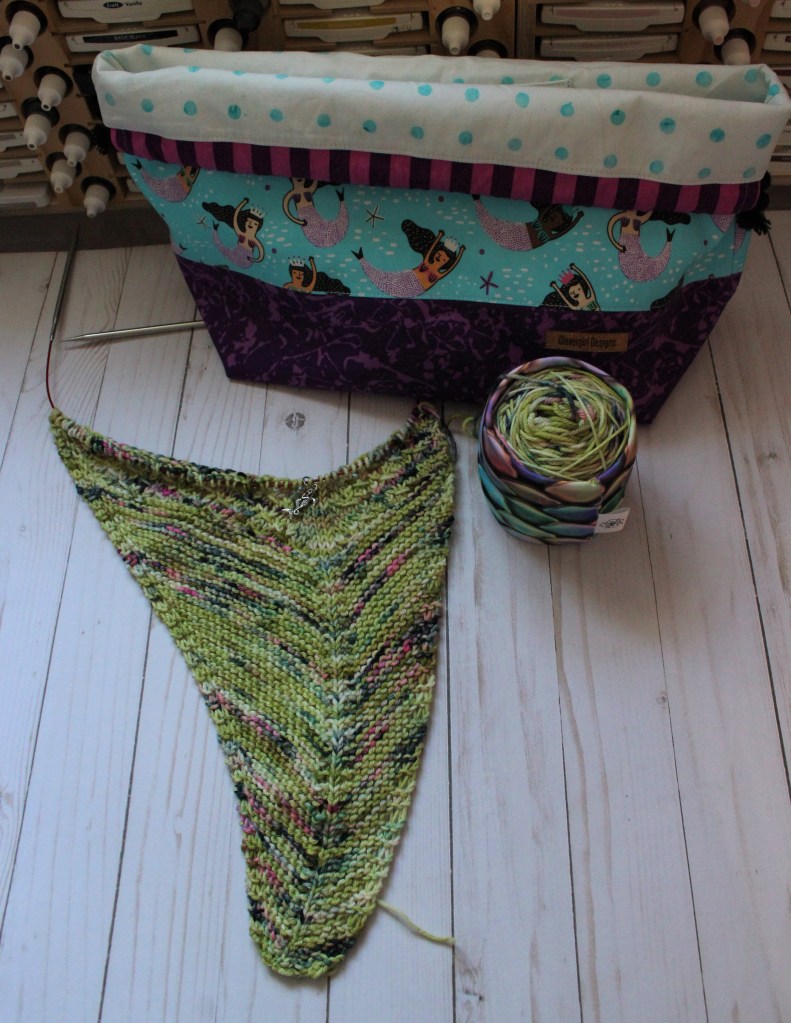
Merfolk Fade Shawl progress
The color I am currently using is called Nessie. It really reminds me of mermaid scales. All the beautiful greens with splashes of Pink, Blue, Purple and Aqua. The other two colors in the fade are Sea Swords and Mermaid Mane. I will talk more about those two colors when I get to them. For now I am enjoying the beautiful Nessie.
Lace Section
So far the pattern is well written and I am enjoying the knitting. I have added a few rows of the lace pattern and it looks so pretty. I am loving the way the splashes of color pop up on my needles in between the beautiful shades of green.
So that is what I am stitching this afternoon. What are you stitching on today? Drop me a comment and tell me all about it.
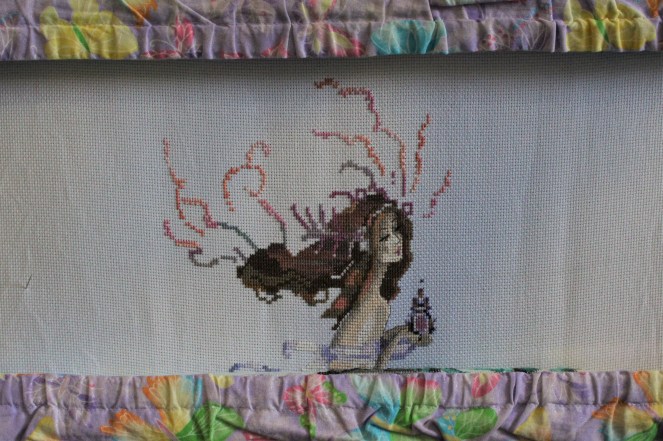
For the last 12 weeks I have been stitching mostly on one project. That project is Mermaid Perfume by Mirabilia. In one of my previous posts, I was working on her tail.
Mermaid Perfume
Since then I have finished that massive tail. So much green!
Mermaid Tail
Just look at that tail!!! I love it! And I am so happy to be finished with all of that green! And then, in no time, she had a face and some hair.
Sweet face
How sweet is her face? It was so nice to finally get to some other colors besides green. And last night I finished all of the cross stitching. So just back stitching and beads left to do.
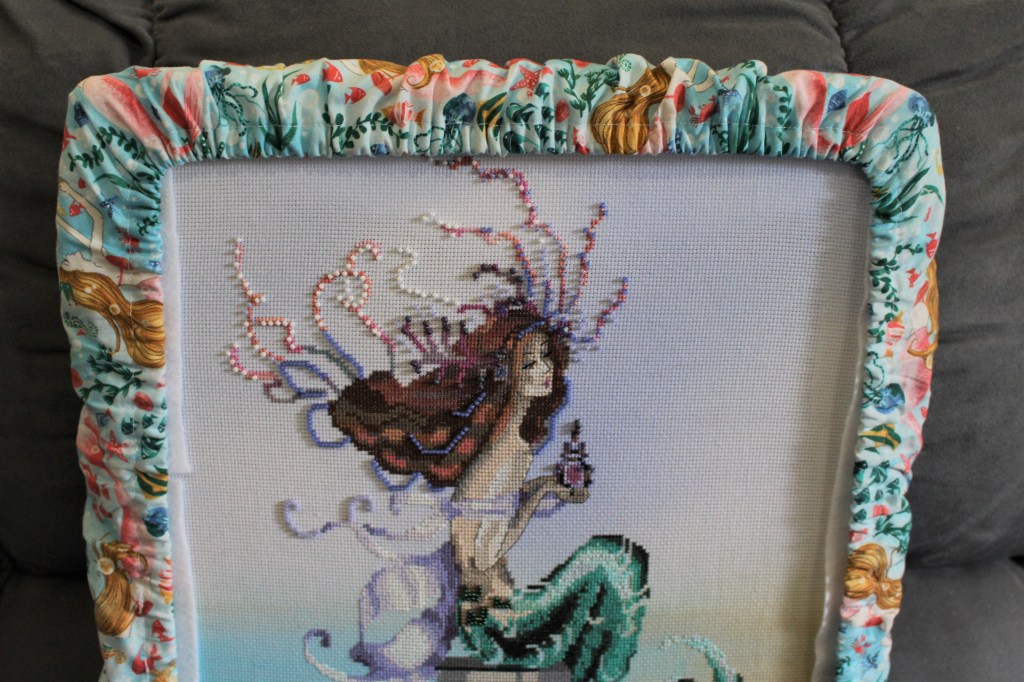
Mermaid Perfume
I am stitching her on 16ct Aida Hidden Cove by Sunny Dyes Fabrics/Youthful Needle Crafts. I cannot wait to unroll the scrolls and see all of her on this beautiful hand painted fabric. The suspense is killing me! When I saw this fabric in the Design and Fabric Viewer, I knew it was going to be perfect for a mermaid. What? You haven’t heard of the Design and Fabric Viewer? This is a site where you can pair certain designer patterns onto certain fabrics listed in the viewer. It is a great resource for cross stitcher’s to see what a particular design will look like on a certain fabric. If you haven’t played in the Viewer, you definitely should give it a try. You have to create an account before starting, and you can save up to 3 images for FREE. Subscribing to the site will allow you to save more images and it also gives you the option to save your personal fabrics onto your account so you can pair images on the fabrics you have in your stash. Give it a try! And if you haven’t tried it in quite some time, it has changed so you’ll want to see what it looks like now. Go, try it out!
So that is what I have been stitching on. I am excited to get to the beading on Mermaid Perfume. Hopefully soon, I will have a finish to share with you. What are you stitching on today?
The CDC announced that we can unmask in most situations if we are fully vaccinated. This is great news, but still scary or awkward. My husband and I just had our first vaccine about 10 days ago. We will get our 2nd dose in a few weeks. Maybe then I will feel a little better about going without a mask, but this has been our normal for 14 months and I am feeling a little uneasy about unmasking. I won’t go into it all, but I am hoping this is a good sign of getting back to some normalcy.
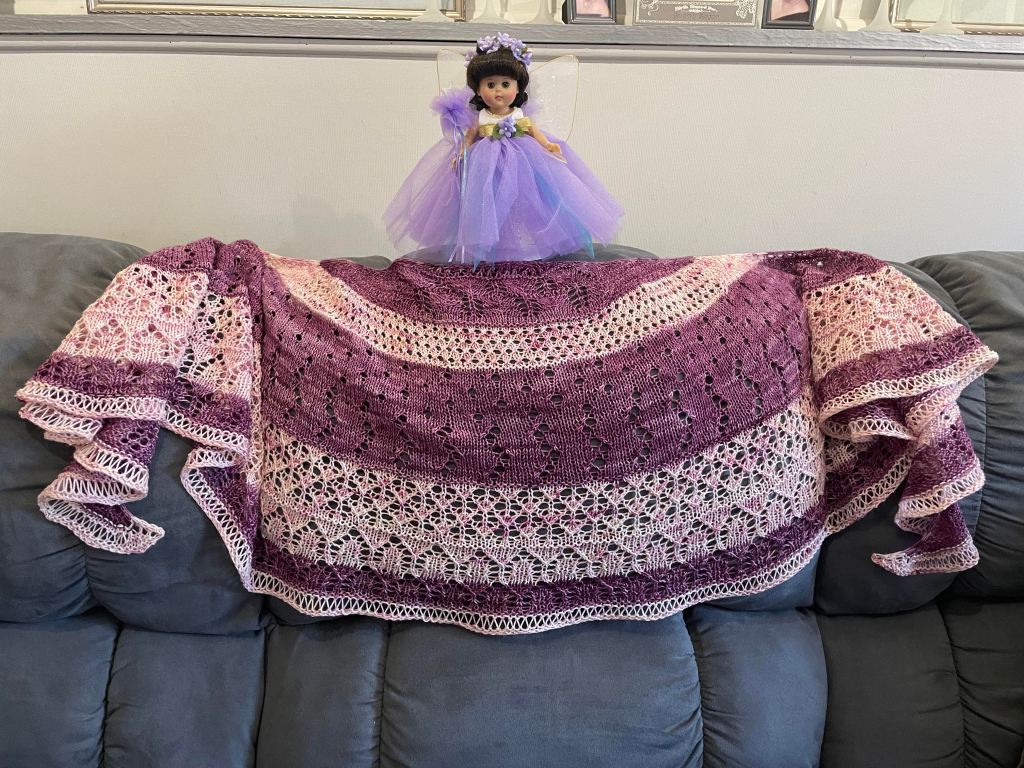
So, I am still keeping busy by crafting. I am also trying to get myself into some kind of routine since hubby will probably being going back to working in the office soon. And that includes making sure that blogging is in my routine again. So where did I last leave off…Oh, I finished the Fairies in the Snow shawl that I was working on.
Fairies in the Snow Shawl
It turned out really nice and I even had a chance to wear it. I love it and can see myself making another one in different colors in the future. The pattern is available on Ravelry and the designer is Lena Matheson. The yarn I used is from The Speckled Finch.
Since then I have made another shawl. This one was a kit made especially for Local Yarn Shop Day April 2021.
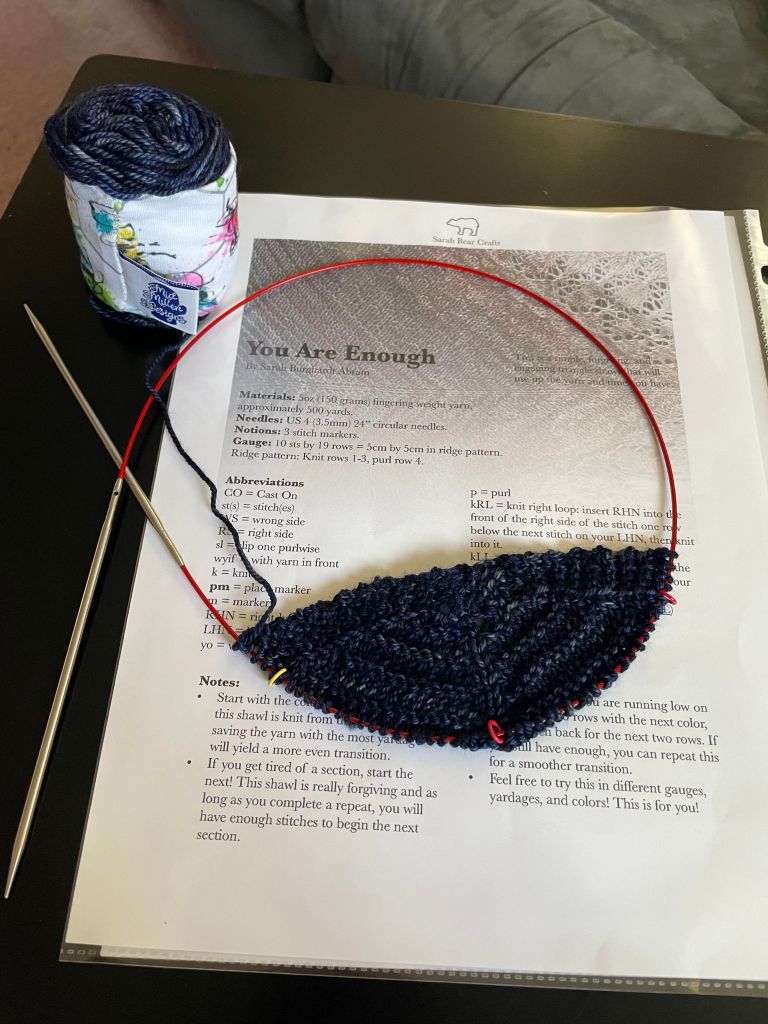
You Are Enough
When I started this kit, I wasn’t really sure I was going to like it. The directions were not very specific as in when to change colors and how many rows to do. I am one of those people that pretty much follows a pattern. So having to make some of my own decisions was a bit scary. But, I dived right in.
You Are Enough Shawl
The pattern is You Are Enough by Sarah B. Abram. I met a very sweet gal on Ravelry who reached out to me about something I had placed on my project. So glad she did, as we chatted together throughout and she made some wonderful notes about her project and took some great photos. She was a big help when I had questions and she cheered me on to keep going.
You Are Enough ProgressMore ProgressLovely LaceBack side of lace
Here is where I was working on the Picot edge bind off. I had never knitted a picot edge nor did I ever bind off this way. Be prepared on this one. It took me about 2 half days to get this bound off. But it was so worth it.
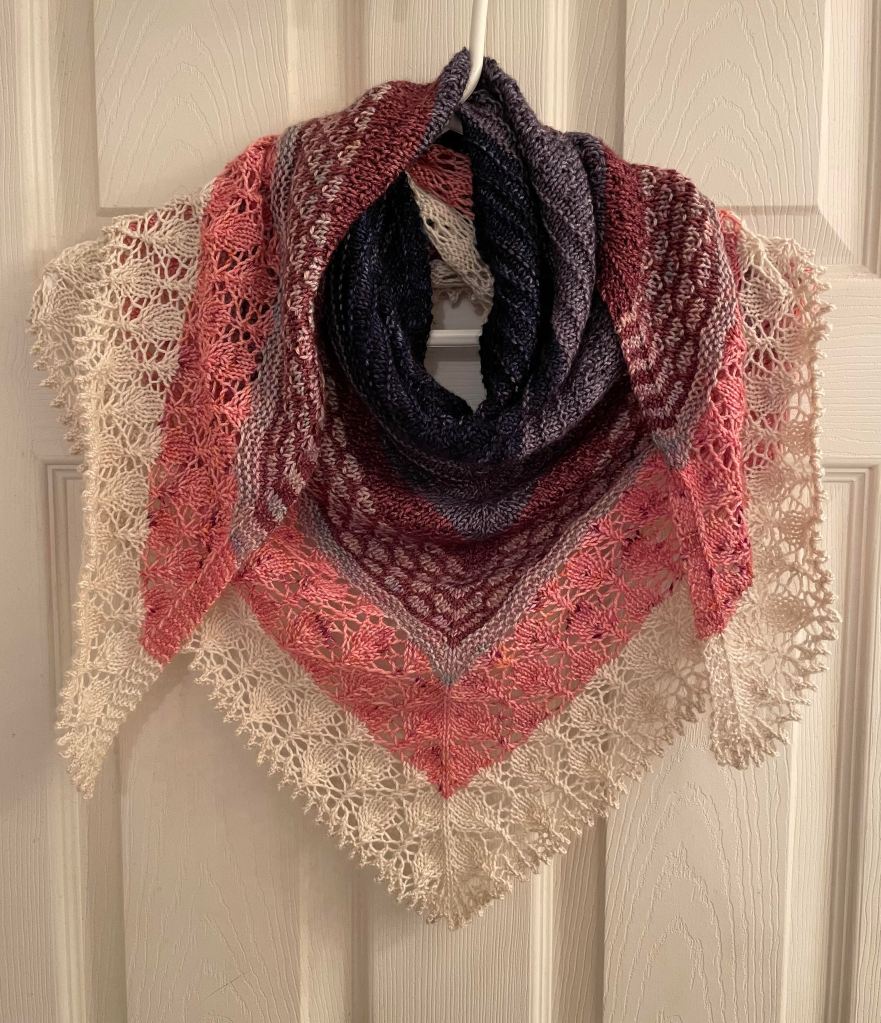
Blocking
This week I got around to blocking it. Just look at how that lace opened up!! Knitting the lace was my favorite part of this pattern. I left out one of the repeats in the burgundy/gray section. So I added a few rows of garter stitch and that also brought my stitch count up to where it needed to be for the lace section. Yep, I added my own element! This pattern also suggested to add 2 rows of the next color, then 2 rows of the current color then continue with the next color. This meant lines of color in each pattern section. I knew from the beginning I did not want those lines of color, so I just switched colors when I was ready to. This really is a forgiving pattern.
You Are Enough Finish
It really turned out beautifully. It was finally a nice day out so I had to take a photo outside. This photo shows the true colors, too. I was a little leery about the colors together, but they have grown on me. I can’t wait to wear it in the fall.
You Are Enough Shawl
The colors in this photo are off. But it looks so pretty hanging like this. In the end this was a really nice pattern and I really enjoyed it. If you have this kit and are looking to knit it up, be sure to check out the projects on Ravelry as there are some really good note takers there. I learned a few new stitches with shawl, and for that I am grateful. I am happy I knitted this one.
Next time I will talk about my cross stitch. So what have you been up to? Drop me a comment and tell me about it. I have missed you so much and I would love to hear about what you are up to.